Kenmore 385.166551 User Manual
Browse online or download User Manual for Sewing machines Kenmore 385.166551. Kenmore 385.166551 User Manual
- Page / 113
- Table of contents
- BOOKMARKS
- Ken mor G 1
- Owner’s Manual 1
- Manual de Instrucciones 1
- Manuel d’instructions 1
- IMPORTANT SAFETY INSTRUCTIONS 2
- ATENCIÓN 3
- CONSERVE ESTAS INSTRUCCIONES 3
- Machine Specifications 6
- OPERATING INSTRUCTIONS 7
- TABLE OF CONTENTS 7
- CONSIGNES D’UTILISATION 9
- TABLE DES MATIÉS 9
- SECTION I. NAME OF PARTS 10
- (D Pressure adjusting screw 10
- (D Face plate 10
- CD Needle plate 10
- (D Side cover 10
- 'íj 11
- (I) Accessory holder 12
- ' ueu u diyuiiieb 13
- ----------------------I 13
- 13
- 1) Plug connector 16
- 0 is OFF 16
- 0 into the wall outlet 0 16
- PARA COSER 17
- How to turn handwheel 18
- Cómo girar el volante de mano 19
- Comment tourner le volant 19
- (D Stretched 22
- (D Adjusting screw 24
- ® Parte plana hacia atrás 25
- Removing the presser foot 26
- Attaching the presser foot 26
- To disengage the upper knife 26
- To engage the upper knife 26
- (I) Palanca 27
- 2) Cuchilla superior 27
- Adjustment of cutting width 28
- Ajuste del ancho de corte 29
- (T) Chaining finger 30
- Cl) Ligne de guidage R 31
- STD. R.H 32
- Initial Set-Up 34
- '•pj 35
- Rethreading a broken thread 36
- 0 Thread guide plate 38
- 'Jj 39
- (D Thread guide plate 44
- (D Upper looper 44
- CD Cadran de tension du fil 45
- 0 Front cover thread guide 3 48
- 2) Placa del guía-hilo 49
- Threading the left needle 50
- 3-thread serging 52
- Surjete con tres hilos 53
- Starting to sew 54
- Finishing sewing 54
- Sewing continuousiy 54
- How to use guide iines 54
- APRENDA LAS PUNTADAS 55
- Securing ends 56
- Type of fabic 58
- Stitch length 59
- Differential feed ratio 59
- Thread tension (4 threads) 60
- Incorrect tension 62
- Thread tension (3 threads) 64
- Narrow hem 66
- (T) Wrong side of fabric 66
- Dobladillo angosto 67
- Ourlet étroit 67
- Cl) Derecho de la tela 67
- Cl) Fil du boudeur inférieur 67
- Cl) Bon côté du tissu 67
- Roiied hem 68
- Dobladillo enrollado 69
- Ourlet roulé (roulotté) 69
- (D Revés de la tela 69
- (D Hilo del ojo-guía superior 69
- (D Mauvais côté du tissu 69
- Picot edge 70
- Borde de encaje 71
- Bordure à picots 71
- (D Cut off 72
- (D Upper knife 72
- C§) Lame supérieure 73
- Edging curves 74
- C¿) Recortar 75
- Bordes en curvas 75
- Surjet des courbes 75
- (D Needle thread 76
- Sobrehilado 77
- Surjeteuse 77
- CD Espace pour coudre 77
- Overlooking 78
- Sobreorillado 79
- Point de surfil 79
- Machine setting 80
- CD Espacio para costura 81
- C3) Puntada recta 83
- Cl) Mauvais côté du tissu 83
- CI) Point droit 83
- Lace application 84
- Decorative edge 86
- Borde decorativo 87
- Bordure décorative 87
- CD Derecho de la tela 87
- Machine Setting 88
- Blind hem 90
- (D Hem bottom 90
- (D 1/4" (0.6 cm) lip 90
- Dobladillo ciego 91
- Ourlet Invisible 91
- Attaching stretch waistband 94
- C 95
- Braiding 96
- Trenzado 97
- Soutache 97
- Attach sleeve 98
- Flared skirt 100
- Falda en campana Jupe évasée 101
- Gathering 102
- CD Froncer 103
- 0 Lower knife 104
- Cl) Tornillo hexagonal 105
- Cl) Boulon à six pans 105
- 0 To attach 106
- /ICn. _ 107
- Oiling the machine 108
- Carrying the machine 108
- What to do when 110
- Qué hacer cuando 111
- Quoi faire et quand 112
- 1-800-4-MY-HOME" 113
Summary of Contents
Ken mor GSERGEROwner’s ManualOVERLOOKManual de InstruccionesSURJETEUSEManuel d’instructionsModel, Modelo, Modèle 385.16655100791-820-007Sears, Roebuck
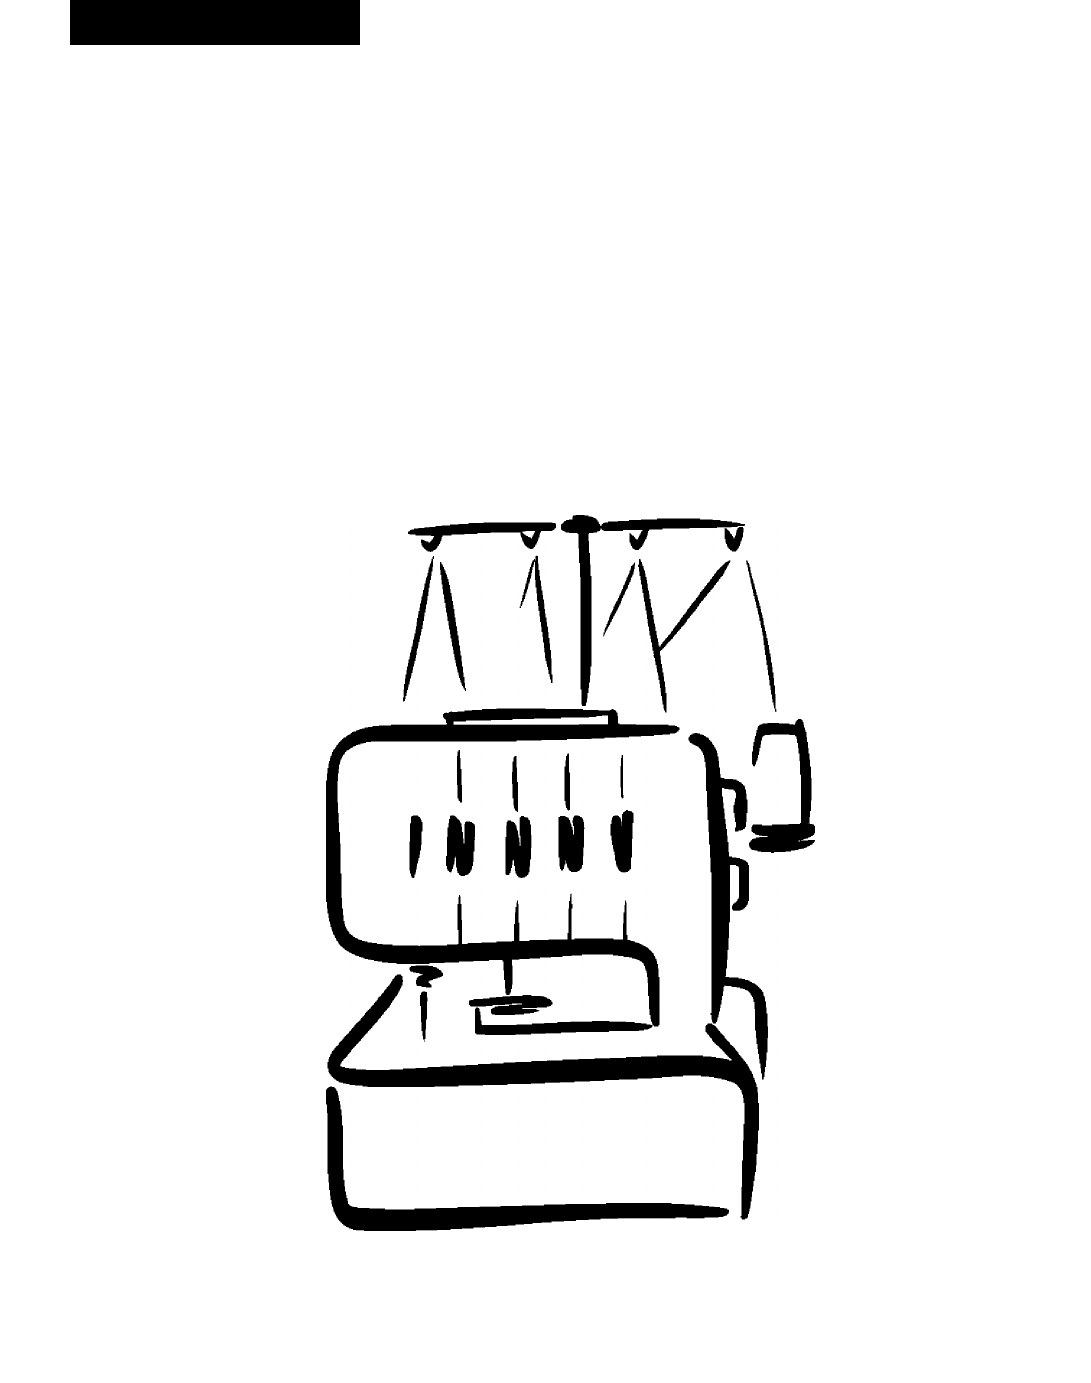
SECTION I. NAME OF PARTSTote Bag (RSOS # 97603)Tote bags are available through the RSOS (Retail Special Order System) catalog at your nearest Sears re
Flared skirtYou can finish a flared skirt beautifuily and quickly with the differentia! feed function.Machine settingNumber of threads: 4Number of ne
Falda en campana Jupe évaséeUsted puede terminar una hermosa falda en campana rápidamente Vous pouvez finir votre jupe évasée rapidement avec îe rapp
GatheringMachine settingNumber of threads; 4Number of needles: 2Differential feed ratio: 1.0 to 2.2Stitch length: 3Needle thread tensions (Gold &a
Fruncido FroncesAjuste de !a máquinaTRéalaae de la machineTNúmero de hilos:4Nombre de fils:4Número de agujas:2Nombre d’aiguilles:2Relación de avance d
SECTION IV. CARE FORYOUR MACHINEReplacing the upper knifeTo remove:® Upper knife (D Hexagon bolt (3) Stopper pin 0 Lower knifeTurn off the power switc
SECCION IV. CUIDADO DE LA MAQUINACambio de la cuchilla superiorPara quitar la cuchilla:® Cuchilla superior Cl) Tornillo hexagonal ® Pasador de tope ®
Replacing the light bulb(T) Set screw (2) Face plateTurn off the power switch and unplug the machine.Loosen the face plate set screw (T), and remove t
Cambio de la bombilla® Tornillo de fijación CD Placa frontalApague el interruptor de encendido y desenchufe la máquina.Afloje el tornillo de fijación
Oiling the machineApply a few drops of fine quality sewing machine oil to the parts indicated with arrows.It is recommended that you apply oil once a
Lubricación da la máquinaAplique unas cuantas gotas de aceite de buena calidad para máquinas de coser en las partes indicadas con las flechas.Es recom
SECCIÓN I. NOMBRE DE LAS PARTES Bolsa de manoUsted encontrará bolsas de mano en el catálogo RSOS disponible en las tiendas Sears.partie I. IDENTIFICAT
SECTION V. PERFORMANCE PROBLEMS CHARTWhat to do whenConditionCauseReferenceThe fabric is not being fed smoothly.1. The feed dog is padied with iint.2
SECCION V. GRAFICA DE PROBLEMAS DE FUNCIONAMIENTOQué hacer cuando^CondiciónCausa ReferenciaLa tela no avanza1. El trinquete de avance está lleno de pe
PARTIE V. CONSEILS EN CAS DE DIFFICULTESQuoi faire et quandfDéfautCauseCorrectionLe tissu n’avance pas 1. Les griffes d’entraînement sont remplies de
Get it fixed, at your home or ours!For repair of major brand appliances in your own home, no matter who made it, no matter who sold it!1-800-4-MY-HOME
Attaching the waste catcher® Waste catcherStoring the accessory holderInsert the accessory holder into the waste catcher.(2) Waste catcher(I) Access
Colocación del colector de recortes de desperdicio Installation du ramasse-chutesCi) Colector de recortes ® Ramasse-chutesCómo guardar la caja de acc
Available Accessories and AttachmentsTo order parts and accessories listed below, call:1-800-366-PART (1-800-366-7278)6 ann -11 pm, CST, 7 days a week
Accesorios y refacciones disponiblesPara ordenar las partes y accesorios listados abajo> llame al; 1-800-366-PART (1-800-366-7278)de 6 AM all PM, h
SECTION II. GETTING READY TO SEWPlug in the machine and switch on the power® Power supply plug(2) Outlet(1) Plug connector 0 Power switch 0 Machine
SECCION II. PREPARE LA MAQUINA PARA COSEREnchufe la máquina y enciéndala® Enchufe para la fuente de energía ® Toma de corriente ® Conector de clavija
How to turn handwheelAlways turn handwheel toward you. ® HandwheelOpening and closing the side cover(T) Side cover• To openPush the side cover ® to th
Cómo girar el volante de manoComment tourner le volantGire siempre el volante de mano hacia usted. CD Volante de manoTournez toujours le volant vers v
IMPORTANT SAFETY INSTRUCTIONSCAUTIONYour Serger is designed and constructed only for HOUSEHOLD use.Before using this Serger, read this manual and foll
Positioning the telescoping thread guide bar® Thread guide(2) Telescoping thread guide bar(3) Stoppers 0 Spool pinQ] Pull the telescoping thread guide
Posicionamiento de la barra telescópica de los guía-hilosPositionnement du support télescopique de guide-filsФ Guía -hiloBarra telescópica de los guía
Adjustment of stitch length® Setting mark(2) Stitch length dialTo select stitch length, turn the dial (2).The larger the number, the longer the stitc
Ajuste de la longitud de puntada® Marca de colocación CD Selector de longitud de puntadaPara seleccionar la longitud de puntada, gire el selector CD-
Changing the needle(T) Needle clamp screw on the left(D Needle damp screw on the rightQ] Turn off the power switch and unplug the machine.[U Turn the
Cambio de la aguja® Tornillo izquierdo de sujeción de la aguja C¿) Tornillo derecho de sujeción de la agujaApague el interruptor de encendido y desenc
Removing the presser foot(T) Presser foot iifter(2) Needle(3) Lever® Foot holderQ] Turn off the power switch and unplug the machine.[2] Raise the need
Extracción del prénsatelasEnlèvement du pied presseur(T) Palanca elevadora del prénsatelas (D Aguja (I) Palanca(4) Soporte del prénsatelas® Levier rel
Adjustment of cutting widthWhen cutting width is too narrow or too wide for seam width, adjust as follows.Q] Turn off the power switch and unplug the
Ajuste del ancho de corteCuando el ancho de corte sea demasiado estrecho o demasiado ancho respecto al ancho de la costura, ajústelo como se indica a
INSTRUCCIONES DE SEGURIDAD IMPORTANTES ATENCIÓNEsta Overlock está diseñada y construida sólo para uso doméstico.Antes de usar esta máquina de coser, !
Adjustment of needle plate setting knob (Changing to standard serging or rolled hemming)(T) Chaining finger(2) Guide line(3) Cutting width adjusting d
Ajuste del botón de posición de la placa de agujas (cambio a surjete estándar o dobladillo enrollado)(1) Dedo de encadenamiento(2) Línea de guía@ Sele
Setting the lower looper pre-tension setting siiderStandard serging (STD.)(T) Lower looper pre-tension setting slider Standard serging with 3 or 4 thr
Ajuste del dispositivo deslizante de pretensión Surjete estándar (STD.)CD Corredera de ajuste de pretensión del ojo-guía inferior Surjete estándar con
Initial Set-UpIMPORTANTRead a!! Set-Up instructions before beginning set-up.(T) Green (2) Red (DBiue 0Gold©Threading chart (Located behind iooper cove
Preparación InicialImportanteLea las instrucciones de enhebrado antes de llevar a cabo el enhebra do-(D Verde(¿)(DRojoAzulDoradoDiagrama de enhebrado{
Rethreading a broken threadIf one of the threads breaks:Turn off the power switch and unplug the machine.CD Raise the presser foot and pul! the thread
Reenhebrado de un hilo rotoEnfilez à nouveau le fil briséSi se rompe uno de los hilos:Apague el interruptor y desconecte la máquina.[j.j Levante el pr
Rethreading the SergerThreading the lower looperOpen the iooper cover.Place the spool of thread on the right side spool pin.• Lower looper threading p
Reenhebrado de la SergerEnhebrado del ojo-guía inferiorAbra la tapa de los ojos-guíal.Coloque el carrete de hilo en el portacarretes derecho.• Los pu
IMPORTANTES CONSIGNES DE SECURITE CONSERVEZCES CONSIGNESATTENTIONVotre surjeteuse a été conçue et construite pour un usage ménager uniquement. Avant d
insert thread between the tension discs.Hoid the thread at both ends and tug gently to ensure the thread is correctiy inserted between the tension dis
[|j Inserte hilo entre los discos de tensión.Sujete el hilo en ambos extremos y tire suavemente para asegurarse de que el hilo esté correctamente intr
How to thread woolly nylon/polyester thread® Lower looper(2) Ordinary thread(3) Wooily nyion/polyester threadThis is one of the easiest ways to pass w
Como enhebrar hilo de nylon o poliéster lanoso Enfilage du fil de nylon/polyester extensibleCO Ojo-gui'a inferiorCl) Hilo ordinario Cl) Hilo de n
Threading the upper looperPiace the spool of thread on the spool pin second from the right.Upper iooper threading points are marked in red.A convenien
Enhebrado del ojo-guía superior Enfilage du boudeur supérieurColoque el carrete de hilo en el segundo portacarretes de la derecha.Los puntos a enhebra
I Hook the thread through the slot (§), and then pass the thread through the thread guide plate and the looper thread guide.0 Thread guide plate 0 Loo
[4j Enganche el hilo a través de la ranura (D, y luego pase el hilo a través de la placa de los guía-hilos y el guía-hilo del ojo-guía. (?) Placa de l
Threading the right neediePlace the spool of thread on the spool pin second from the left.Right needle threading points are marked in blue.A convenien
Enhebrado de la aguja derechaColoque el carrete de hilo en el segundo portacarretes de la izquierda.Los puntos de enhebrado para la aguja derecha está
WARRANTYFULL FIVE YEAR WARRANTY ON MECHANICAL COMPONENTS OF SERGERFor five years from the data of purchase, Sears w/ill, free of charge, repair defect
Threading the left needlePlace the spool of thread on the left side spool pin.Left needle threading points are marked in gold.A convenient threading c
Enhebrado de la aguja izquierdaEnfilage de l’aiguille, côté gaucheColoque el carrete de hilo en el portacarretes de la izquierda. Los puntos a enhebra
3-thread sergingRegular 3-thread serging: 1/8" (3.5 mm) width • Use only right needleQ] Turn off the power switch and unplug the machine.[2] Remo
Surjete con tres hilosSurjete regular con tres hilos: anchura de 3.5 mm (1/8") * Emplee únicamente la aguja derechaApague el interruptor de encen
SECTION III. LEARN THE STITCHESStarting to sewInsert the fabric under the front of the foot.(It is not necessary to raise the foot.)Turn the handwheel
SECCIÓNAPRENDA LAS PUNTADASPARTIE III. CONNAITRE LES POINTSPara empezar a coserIntroduzca la tela bajo la punta del prénsatelas (No es necesario subir
Securing endsTo avoid unraveling, it is necessary to leave a thread chain 2" {5 cm) long at the beginning and end of the seam. To secure the begi
Cómo asegurar los extremos de la costura Liaison des bouts de couturePara evitar que !a costura se deshile^ es necesario dejar una cadeneta de hilos d
Thread and needle chart Cuadro de hilos y agujasTableau des fils et des aiguillesType of fabic Tipo de tela Type de tissuType of threadTipo de hilo Ty
NeedieAgujaAiguilleStitch lengthLongitud de puntadaLongueur du pointDifferential feed ratio Relación de avance diferencial Rapport d’entraînement diff
Machine SpecificationsItem specificationSewing speed1,300 s.p.mStitch length (feed amount) 1-5 mm (Ordinary average 3)Differential feed ratio 1:0.5-1:
Thread tension (4 threads)Adjusting the thread tension may be required depending on the type of fabric and thread being used.Correct tension(T) Wrong
Tensión del hilo (4 hilos)Es posible que sea necesario ajustar la tensión del hilo según el tipo de tela y de hilo que se estén utilizando.Tension du
Incorrect tension® Wrong side of fabric (2) Lower iooper thread (1) Right needle thread 0 Right side of fabric 0 Left needle thread ® Upper Iooper thr
Tensión incorrectaMauvaise tension® Revés de la telaHilo del ojo-guía inferior Hilo de la aguja derecha Derecho de la tela Hilo de la aguja izquierda
Thread tension (3 threads)Correct tension® Wrong side of fabric(2) Needie thread(3) Lower looper thread 0 Right side of fabric 0 Upper looper threadAd
Tension del hilo (3 hilos)Tensión correctaTension du fil (3 fils) Bonne tension® Revés de la tela Cl) Hilo de la agujaHilo del ojo-guía inferiorr6\® H
Narrow hemA technique used to finish the outside edges of light to medium weight fabrics. Avoid using fabrics that unravel easily.Machine settingNumbe
Dobladillo angostoTécnica utilizada para acabar los bordes exteriores de telas de peso ligero a mediano. Evite usar telas que se deshilachen fácilment
Roiied hemA decorative edge suitable for lightweight fabrics works great on the frills of blouses or the edges of napkins and tablecloths.Machine sett
Dobladillo enrolladoUn borde decorativo adecuado para telas ligeras que funciona muy bien para volantes de blusas^ y en bordes de servilletas y mantel
OPERATING INSTRUCTIONS TABLE OF CONTENTSSECTION I. NAME OF PARTS ...2Tote Bags...
Picot edgefMachine settingNumber of threads:3Number of needles:1(Remove the needle on the left.) Differential feed ratio: 1.0Stitch length: 3 to 4Righ
Borde de encajeBordure à picots' Ajuste de la máquinaRéglage de la machineNúmero de hilos: 3Nombre de fils: 3Número de agujas:1Nombre d’aiguilles
Turning cornersOutside cornersQ] Use scissors to cut a 1" (2.5 cm) iong strip from 3 corners of the fabric. See illustration.(T) Cutting line (D
Doblado de esquinasEsquinas exterioresLiJ Con tijeras, corte tiras de tela de 2.5 cm (1") de longitud a partir de tres de las esquinas. Vea la il
Inside corners[T] Clip fabric corner, as illustrated, with scissors. (T) Cutting line (DciipI Serge along the cutting line up to 1" (2.5 cm) befo
Esquinas interiores[í j Recorte la esquina de la tela, tal como se ilustra, con unas tijeras-(1) Línea de corte C¿) RecortarCoins Intérieurs[ij Avec d
OveredgingOveredging w/ith a serger is the simplest and quickest way to finish the raw edges of fabric.Useful for the open seams of jackets, pants, et
SobrehiladoEl sobrehilado con una máquina de surjete es la manera más fácil y rápida de terminar los bordes no acabados de una tela. Es útil para cost
OverlookingWith the Kenmore Serger, you can trim, overedge and seam—ali in one operation— when making shirts, blouses, swimsuits and any type of knit
SobreorilladoCon la Kenmore Overlock se puede recortar, sobrehilar y hacer costuras, todo en una sola operación, al hacer camisas, blusas, trajes de b
INSTRUCCIONES PARA LA OPERACIÓNINDICESECCIÓN I. NOMBRE DE LAS PARTES... 3Bolsa de mano...
Elastic (for wide elastic band)Use this technique when applying elastic to lingerie.A soft elastic band is recommended.(Uneven or skipped stitches may
Elástico (para cinta elástica ancha) Élastique (pour large bande élastique)Utilice esta técnica al colocar elásticos en lencería.Se recomienda una cin
Elastic {for narrow elastic band)For swimsuits or ieotards, attach elastic in the following manner.Machine settingNumber of threads;3Number of needles
Elástico (para cìnta elástica estrecha)Para trajes de baño y leotardos, ponga el elástico de la manera siguiente.Élastique (pour bande élastique étroi
Lace applicationAn inconspicuous stitch used to attach lace edging tolingerie or evening wear.fMachine settingNumber of threads:4Number of needles: 2D
Aplicación de encajeUna puntada discreta utilizada para poner bordes de encaje en lencería y trajes de noche.DentelieII s’agit d’un point invisible ut
Decorative edgeBrighten up a skirt or blouse with a decorative edge.Machine settingNumber of threads:3Number of needles:{Remove the needle on the righ
Borde decorativoAlegre una falda o blusa con bordes decorativos.Bordure décorativeUne bordure décorative peut égayer une jupe ou une blouse.Ajuste de
Decorative flatlock (Topstitching)With the Kenmore Serger, a whoie new world of decorative sewing opens up.Try using the following method to create a
Decoración plana (sobrecostura)Con la Kenmore Overlock se abre todo un nuevo mundo de costura decorativa. Intente utilizar el método siguiente para cr
CONSIGNES D’UTILISATION TABLE DES MATIÉSPARTIE 1. IDENTiFiCATiON DES PIECES DE LA MACHINE... 3Sac de transport...
Blind hemThe blind hem stitch can be neatly done on most knit fabrics.Machine settingNumber of threads;3Number of needles:(Remove the needle on the ie
Dobladillo ciegoLa puntada de dobladillo ciego se puede hacer muy bien en la mayoría de las telas tejidas.Ourlet InvisibleLe point invisible est tout
PintuckPintucks add a personal touch to your garnnent.Machine settingNumber of threads: 3Number of needles: 1{Remove the needle on the left.)Differe
Pliegue pequeñoLos pliegues pequeños añaden un toque personal a sus prendas.Ajuste de la máquinaNúmero de hilos: 3Número de agujas: 1(Quite la aguja
Attaching stretch waistbandMachine settingNumber of threads:Number of needles:Differential feed ratio:Stitch length:Needle thread tensions (Gold &
Colocación de una cinta elástica en la cinturaPose d’une ceinture montée élastiqueAjuste de la máquinaNúmero de hilos: 4Número de agujas: 2Relación
BraidingWhen you want to make coordinating trim or belts, serge over a tape using ornamental threads, such as yarn, ribbon or buttonhole twist, in the
TrenzadoCuando quiera hacer cordones o cinturones coordinados, cosa con surjete sobre una cinta usando hilos ornamentales, como hilaza, listón o punto
Attach sleeveSleeves can be attached quickly and easily using the differential feed function.Machine settingNumber of threads: 4Number of needles: 2
Colocación de mangasLas mangas pueden colocarse fácil y rápidamente utilizando la función de avance diferencial.Assemblage des manchesLes manches peuv
Related products and manuals for Sewing machines Kenmore 385.166551
 (50 pages)

 (139 pages)
(98 pages)
(109 pages)
(18 pages)
(51 pages)
(117 pages)
(36 pages)
(89 pages)
(134 pages)
(44 pages)
(139 pages)
(98 pages)
(109 pages)
(18 pages)
(51 pages)
(117 pages)
(36 pages)
(89 pages)
(134 pages)
(44 pages)
© 2020, manymanuals.com. All rights reserved. | 0.050 s |
 Manymanuals.com
 Manymanuals.de
 Manymanuals.fr
 Manymanuals.it
 Manymanuals.pl
 Manymanuals.cz
 Manymanuals.es
 Manymanuals-pt.com
Comments to this Manuals